Choosing a Logo and and a Header Layout
Latest update: June 22, 2022 | Reading time: 4 to 5 minutesFaber supports 2 logos/varieties for your site. The one is the standard WordPress option you can find in the Customizer. The other is the Alternative logo. Each one is configured separately. The logo position is related to the Header Layout as well. In this post, we’ll see how to set the logo we need on any page.
Note that, you can choose a global logo on the Theme Options and a logo on each page using the Page Options. Due to the nature of WooCommerce product pages, setting a logo on the Shop page will appear the same on every product page of the site. So, let’s dig in.
Uploading the standard logo
Log in to the WordPress Dashboard and go to Appearance > Customize > Site Identity > Logo. At this location, you can upload the logo. For better results, choose a logo that is exactly the size you need to appear. Also, make sure the image has no empty space around it.
![]()
Uploading the alternative logo
Go to Dashboard > Theme Options > Header > Logo > General Logo Options > Alternative Version Image and upload the logo. As you can read at the description of this option, if you don’t upload an image on the standard WordPress location, the alternative will be used on the site. Again, we recommend using an image of the absolute size you need. To fine-tune the size and the position of the logo go to Logo Dimensions, lower on the same page.
If you have uploaded an image in both the standard option of WordPress and on the Theme Options, above, in the same tab (General Logo Options) you can also choose which one you need to appear on the site (CrossTheme or Alternative versions).
![]()
Note that, the Alternative Version logo of our demo is white with no background, therefore you can hardly see it in the box. But it’s there!
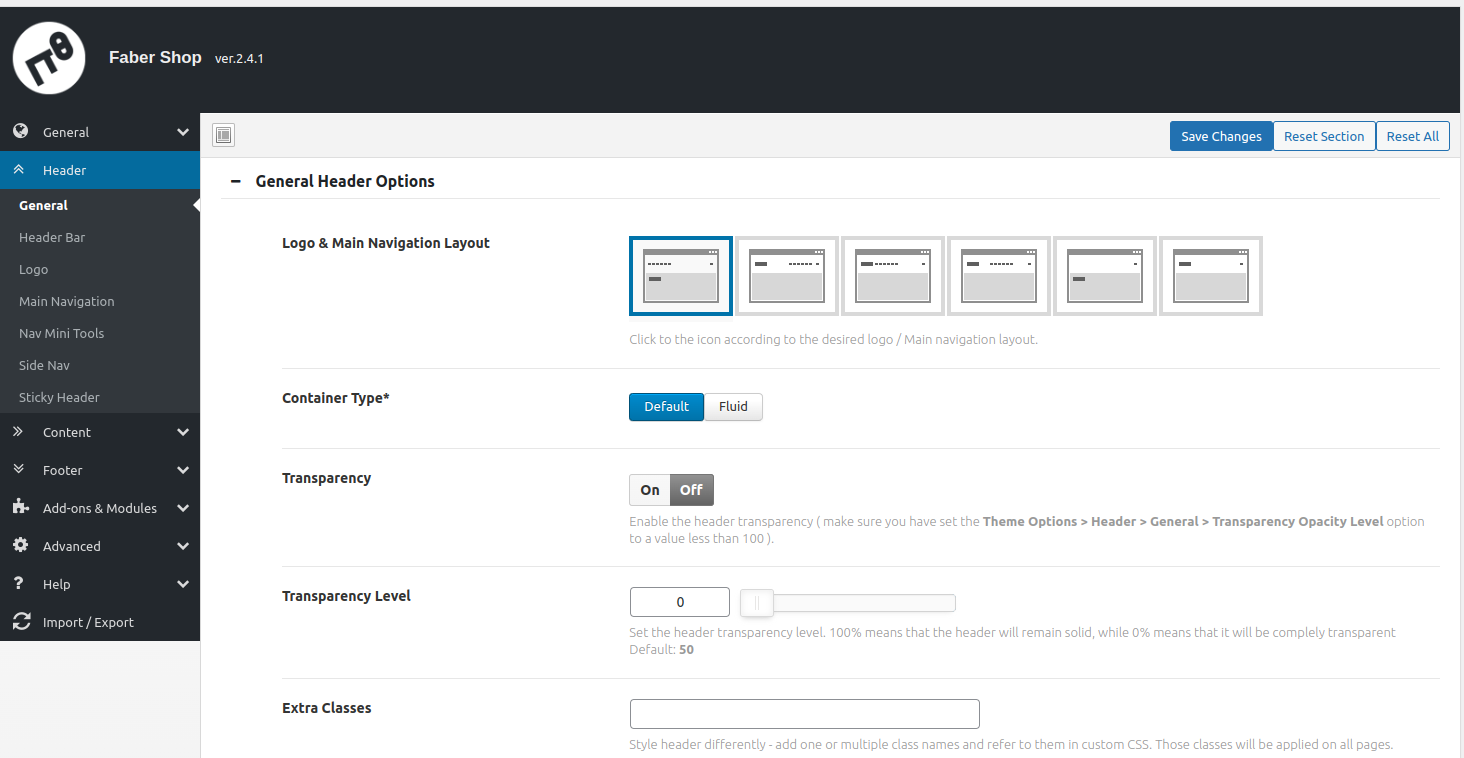
Choosing a layout (global)
After uploading the logo, go to Theme Options > Header > General Header Options and choose a Logo & Main Navigation Layout. This will also set the position of the menu on the site. Faber supports 6 layouts for, combined, the header and the logo.
Extra options
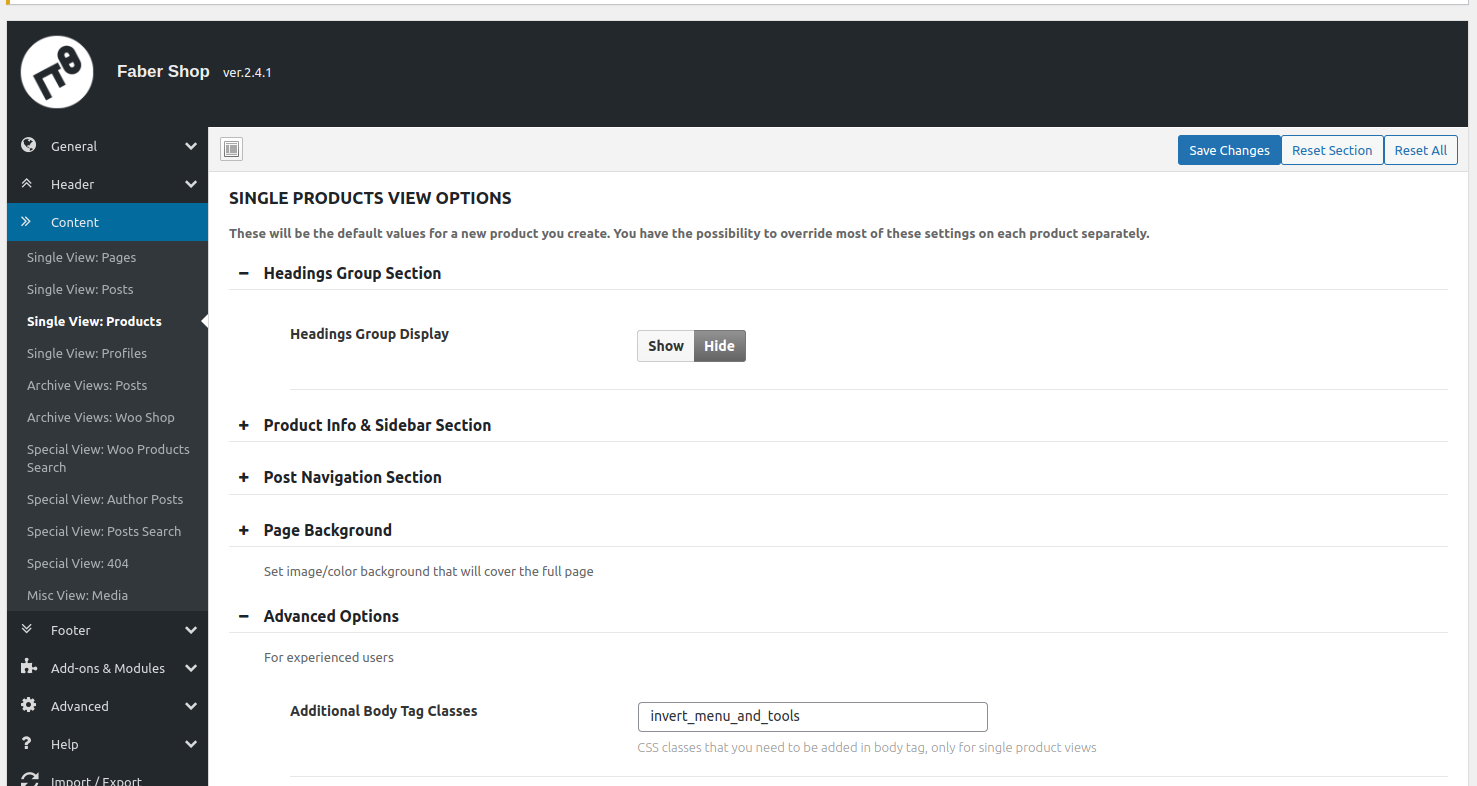
For making your site more interesting for the visitors, and for separating the pages from the products, Fabers provides additional options for the header that also affect the logo. In particular, on product pages, you can invert the colors of the header by adding a specific class on a special field.
This one is at Theme Options > Content > Single View: Products > Advanced Options. Locate the Additional Body Tag Classes field and add (or remove) the following line
invert_menu_and_tools
You can achieve the same effect on the pages with a few clicks. Go to Theme Options > Content > Single View: Pages > Advanced Options and use the switch to activate the Invert Menu option.
Don’t forget to Save changes each time you make a change on the Theme Options or they won’t apply.
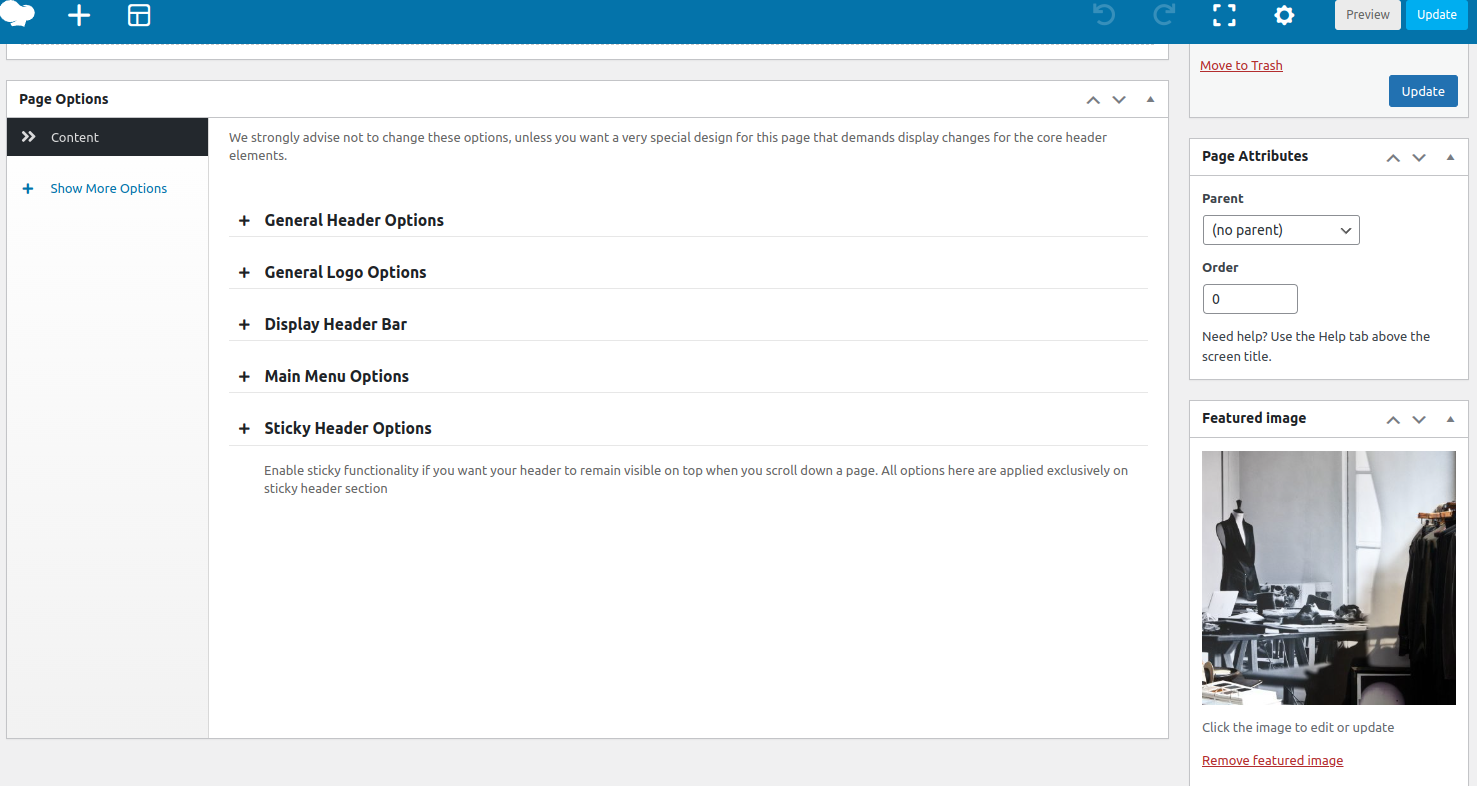
Choosing a Header Layout and Logo per page
To do that, edit the page you need and go to Page Options. You should be able to review the options. On the General Header Options, you can choose a layout and on the General Logo Options, you can choose a logo. Note that, per-page settings will override the Theme Options. As mentioned before, product pages are configured on the Shop page and they all share the same layout – logo settings.
VALID FOR ALL VERSIONS OF FABER